Showing posts with label Mazon Labs. Show all posts

Saturday, 4 September 2021

Nido de Plaga IV: Secure the Landing Site

From: Marauder Central Command
To: Commander, Marauder Assault Cruiser Mandrake

Captain,


Our long range sensors have picked up distress signals from planet Nido de Plaga IV that indicate a major disaster has swept the planet. Details of the exact nature of the disaster are as yet unclear. We believe the planet was home to a Mazon Labs research facility, this corporation is known to have an extensive weapon and bio-tech research program. As you can see from your star chart the planet is close to the Death Arc and therefore on the border of Asterian space. We believe local resistance should be limited but you should be prepared for other off planet forces to arrive and investigate.
Your mission is to travel to Nido de Plaga IV at top speed and once their neutralise any remaining corporate threats, discover what the cause of the disaster was and most importantly secure any remaining technology for the Marauder cause. Your ship and it's company will be the only Marauder forces on hand so all other forces met are to be considered hostile and dealt with swiftly and with extreme prejudice.
Your first task on arrival at the planet will be to secure a landing site for your ground forces, once this is completed further instructions will be issued.

Gen. Radgrad.


The message above was received by Marauder Captain T. last week and heralded the start of a 6 mission mini-campaign which will see him lead his brave Marauders onto the planet Nido de Plaga IV to discover what has happened and most likely kick some serious arse. Their first priority was to secure a landing area so heavier equipment could be transferred to the planet surface and to eliminate a Mazon Labs security detachment that was holding the area.


The Marauders advance party landed to find a smaller Mazon Labs force holding off a large number of Plague victims whilst presumably hoping for rescue themselves. Captain T. opted to send the following force into action in this mission:

1 * Marauder Warlord
3 * Marauder Commando's
2 * Mawbeast
1 * Marauder Commando Specialist with HMG
1 * Gruntbot
1 * Ripper Rainmaker
1 * Ripper Mauler


The Mazon Labs force was already deployed on the landing pad and was hotly engaged with multiple groups of Plague Zombies. Lead by Guard Commander Graves they fielded:

1* Guard Commander Graves
3 * Mazon Security Guard
3 * Urbana Black Wing Marine
3 * Urbana Black Wing Ranger Specialist with Thermal Rifle


The Marauder commanders mission was to either wipe out the Mazon Labs forces or reach 15 VP's, as the Zombies are worth zero VP's they would just be getting in the way and we used the AI Zombie rules I'd formulated to control them.


The game started with the Mazon troops mostly concentrating on clearing the closest Zombie packs, not being great in melee they didn't want to let the Zombies get in close. The Marauders mostly pushed forwards and shot at a few Zombies and also opened fire with the HMG Commando on the Mazon troops, wounding one.
In the Zombie turn the one group shambled into Ripper Mauler who managed to take out two of the three attackers but took a wound in the process. We also rolled to place two more groups of Zombies who appeared near the Mazon lines.


A similar pattern was followed over the next couple of turns with the Mazon troops mostly taking shots at close by Zombies though one Specialist did manage to put another two wounds on the Ripper Mauler causing it to flee into the backfield rather than die.


The Marauders split their fire more between the Mazon and the Zombies with the Rainmaker in particular laying down some effective fire on the Mazon and killing several of them. One Mawbeast did manage to die when it charged a lone Zombie, much to it's surprise.


A few turns in I stopped the Zombies from spawning (they had been spawning two groups of three at the end of each turn) to encourage the Marauders to advance and this allowed the Gruntbot and the surviving Mawbeast move up the board. One of the Ranger Specialists also managed to find the single booby-trap on the board but managed to survive both the explosion and the fall that resulted.


As the defenders numbers started to drop the Gruntbot got into action but was largely held by a Security Guard who fought well above her pay grade, the Ranger was however savaged by the remaining Mawbeast. 


Guard Commander Graves pitched into the combat with the Gruntbot but whilst he was able to put two wounds on it in the next the Mawbeast charged in and killed him off.


At this point with the defenders mostly dead and their leader slain the surviving members of the Mazon Labs team scattered, no doubt to become victims for a Zombie horde. 
It had been a hard grinding battle for the Marauders but they had the landing platform they required to supply a proper mission on the planet.


Saturday, 3 July 2021

Deadzone: AI Zombies

 The game of Deadzone is set within the eponymous 'Deadzones' of the Galactic Co-Prosperity Sphere (GCPS), the rule book describes as Deadzone in this manner:

A Deadzone is a place where ordinary rules do not apply. Any intruder, human or otherwise, found on such a planet will be automatically treated as hostile by the Enforcers, who are licensed to use terminal force in all such cases. Between the incidents that render them Deadzones, and the aggressive presence of the Council’s elite forces, these planets represent some of the most dangerous places in the galaxy, but also some of the most lucrative. 

There are several reasons that a Containment Protocol could be enacted on a planet one of which is a Plague outbreak. The Plague spreads across species and infects everything it comes into contact with (except for Marauders who seem immune) and rapidly over-runs a planet. Again in the rulebook we can read:

First encountered in the so-called ‘Death Arc’, an area in the Fifth Sphere of the GCPS, the Plague is one of the greatest threats to all sentient life in the galaxy. Whether the Plague is natural in origin or was, in fact, engineered by some ancient alien civilisation is just one of the many questions surrounding this horrific disease. Its link to artefacts of alien origin is established, though their purpose and provenance remains mysterious. It was thanks to the Plague that the Council established both its own authority over the GCPS as well as the Containment Protocols, as they desperately tried to manage the first encountered infestations of Plague.

So when playing Deadzone on a Plague infected planet it would be nice to have some of the Plague victims to be involved in the game to at least give a hint of what it would be like to fight in a Plague ridden zone. 


Deadzone does already include some rules for how Zombie types can be used in a game but this requires them to be activated each time a player activates a model, which effectively doubles the number of things you need to do for each activation, this can only slow the game down. What I wanted was a way to add the Zombies in but not overly slow down the game play.
My idea is that the AI troops will activate after both players have completed their turn so the normal flow of the game is allowed to continue and then players can resolve the AI at the end. The Zombies are meant to add a little flavour to the game rather than be the focus of the game.


So the principles that control the AI are these:

1) After both players have completed all activations for a turn, activate one squares worth of models at a time, players take it in turns to activate squares until all are done, in any order they like. The player that completed all their activations first gets first choice.

2) Must move/charge towards closest model as defined by behaviour flow, but controlling player decides on the move in cases of more than one valid move.

3) All models in a square move/charge at the same time, so can get the outnumbering bonus together.

4) AI models always attack if able, never defend.

5) When rolling for melee the player controlling the AI troops always rolls for them, even if attacking their own models.

In order to simulate the different types of Plague victims I've come up with 3 behaviour flows which can be assigned to various models. All of these are melee only, again this is to help speed the resolution of the AI phase but also to help keep this a flavourful addition to the game.


The first flow is for those mobs which like to be grouped up and attack as a horde, so the 3Z Zombie is a good example of these. I think these would want to be setup/spawn in groups of 3 on the board. They essentially are happy to engage in melee if they have a friend but would prefer not to if alone.

Horders

1) If in square with another Horder and within 1 of enemy, charge

2) If in square with another Horder move 1 towards closest enemy

3) If alone move 1 toward another Horder within 2

4) Move 1 towards closest enemy


Next up are the solo fighters, so from my collection that would be the Mazon Labs Plague Victim. As the name suggests they would be deployed a single models and they just want to get stuck in ASAP.


Solo Fighters

1) If within 2 of enemy, charge

2) Move 2 towards closest enemy


The last type is the Big Baddy, the Aberration is a perfect example. These want to be the biggest fiercest model on the table so they prioritise the larger models to fight first.


Big Baddy

1) If within 1 of size 3+, charge

2) If within 1 of enemy, charge

3) Move 1 towards closest size 3+

4) Move 1 towards closest enemy


I've not had a chance to play the AI rules yet so I need to work out a few points, like how many of each type do you want on the table at once and how do they get introduced?
My initial feeling is that you could probably have 2-3 groups of Horders and then one Solo Fighter or Big Baddy at a time in a smaller points game 150/175 without it impacting too much, though it could be you just want the Big Baddy on it's own at that points level. Introducing the models onto the table could be done via set spawn points and then a dice roll to see if you get a spawn event or perhaps via the Items counters, if you are feeling nasty.
Another question is should you get Victory Points for killing the AI ? I lean towards a yes on that one, if the majority are going to be the 3Z Zombies which are worth no VP's then it shouldn't unbalance things overly.


So this should be a good starting point to test from and see if the rules work to add some flavour and fun to the game and don't break the flow which makes Deadzone so special.


Sunday, 8 March 2020

The B(laine)-Team

This week I completed the roster of mercenaries for Star Saga and Deadzone. This means I can start work on the Rebs faction for Deadzone for my third faction I can field.

Mantic Games

This group includes Blaine who is a Mantic special character who has the ability to travel between dimensions, this allows him to appear in multiple games such as the Zombie Blaine I painted last year.

Mantic Games

Mantic Games

In the world of Star Saga Blaine is the leader of the mercenary company and as such is the biggest bad-ass in space! He costs around 4 times as much as the other choices so may be a good character to take in a solo game. Also completed are Alyse a space wizard (possibly the best kind) and Kira a Sphyr medic / support character. Whilst Alyse drains the life from others Kira is a more traditional healer.

Mantic Games Star Saga Mercenaries

The other two mercenaries who I have cards for are Curby the flying robot and Halftail who I believe is also to be found in the Dreadball arena. Both are ranged fighters and whilst Curby packed a powerful EMP blast Halftail can plant bombs on scenery pieces.

Mantic Games Star Saga Mercenaries

I also got a model for Leesh'ma but no card so I will have to have a look around to see if I can get one, I'm not sure but she may have come with the Reb Alpha booster pack I bought a while back.

Mantic Games Star Saga Mercenaries

Mantic Games Star Saga Mercenaries

So that completes all the forces (and terrain) for Star Saga. The game comes with a solo mode so I may setup the table and play through some of the missions.

Mantic Games Star Saga

Mantic Games Star Saga

So onto the Rebs next, I have glued all the models together and now need to start getting some paint laid down, as long as I don't get distracted by anything else............

Mantic Games Star Saga


Talking of which I put a pre-order in for Clash of Spears, a new ancients large skirmish game. The game looks to use forces similar in size to Saga and initially is designed for battles around the time of the Punic Wars.

Sunday, 26 January 2020

The Plague

Despite being under the weather and not really feeling like doing much for most of the week I have managed to complete a few more models and get a game in.


I now have both the leaders completed for the Mazon Labs faction so can field a legal strike team.
Neither is really a melee beast so would be happier hanging back and leading from the rear. Graves can be upgraded with a better ranged weapon so could for instance take the Range 4 AP2 Thermal Rifle to add some armour piercing into the team.


As with all leaders they come with a special ability with the Dr being able to raise dead friendly troops as Plague Victims and Graves being able to give some troops a free suppressing fire. Out of the two I like Grave's ability more as it can be used to pin an enemy to allow your melee orientated troops to close the distance.


The other addition for Mazon Labs is the Data Storage Unit which again is a ranged specialist. This unit has Psychic abilities which do not require line of sight to use meaning the enemy has no place to hide. It also has the Invigorate ability which allows you to reactivate a model that has already been activated that turn, very handy to use on a powerful model.


The last two models aren't for the Mazon Labs faction so are unlikely to be used other than in Star Saga. In Star Saga they are two of the bosses that the player Mercenaries have to defeat in the game.


I also had Stu over for a Blood & Plunder game on Saturday and we played the Control the Field scenario. This has only his third game and they have been spread out over several months so some learning was going on whilst we played.


The scenario involves both sides trying to control at least two of three objectives placed along the center line of the table. Both sides start in opposite corners giving them one close objective and generally leads to a scrum in the middle.


The English under Stu's leadership took up a good early position and soon started to score victory points.


This forced me to sacrifice one and then eventually another unit in the open to contest the middle objective and then the Spanish managed to wipe out a couple of English units in melee. The first unit was unlucky not to wipe out a Spanish unit lead down by the objective and was caught on the counter-charge by a supporting unit and the Lanceros for once got a charge in against a fatigued unit so they could not use defensive fire.


In the end I managed to just inflict enough casualties to win by one Strike Point after a bloody six turns.


I also took delivery of some adobe building from Fogou Miniatures, these where from a Kickstarter campaign I backed only 1 month ago, which is a nice quick turn around as these things go.


The models are cast from yellow resin so could be almost used straight from the box, I'm going to put some paint on them though. One big bonus is that no release agent was used in the casting process so the models can be painted without needed to be washed first.

Sunday, 19 January 2020

Who'd be a Redshirt ?

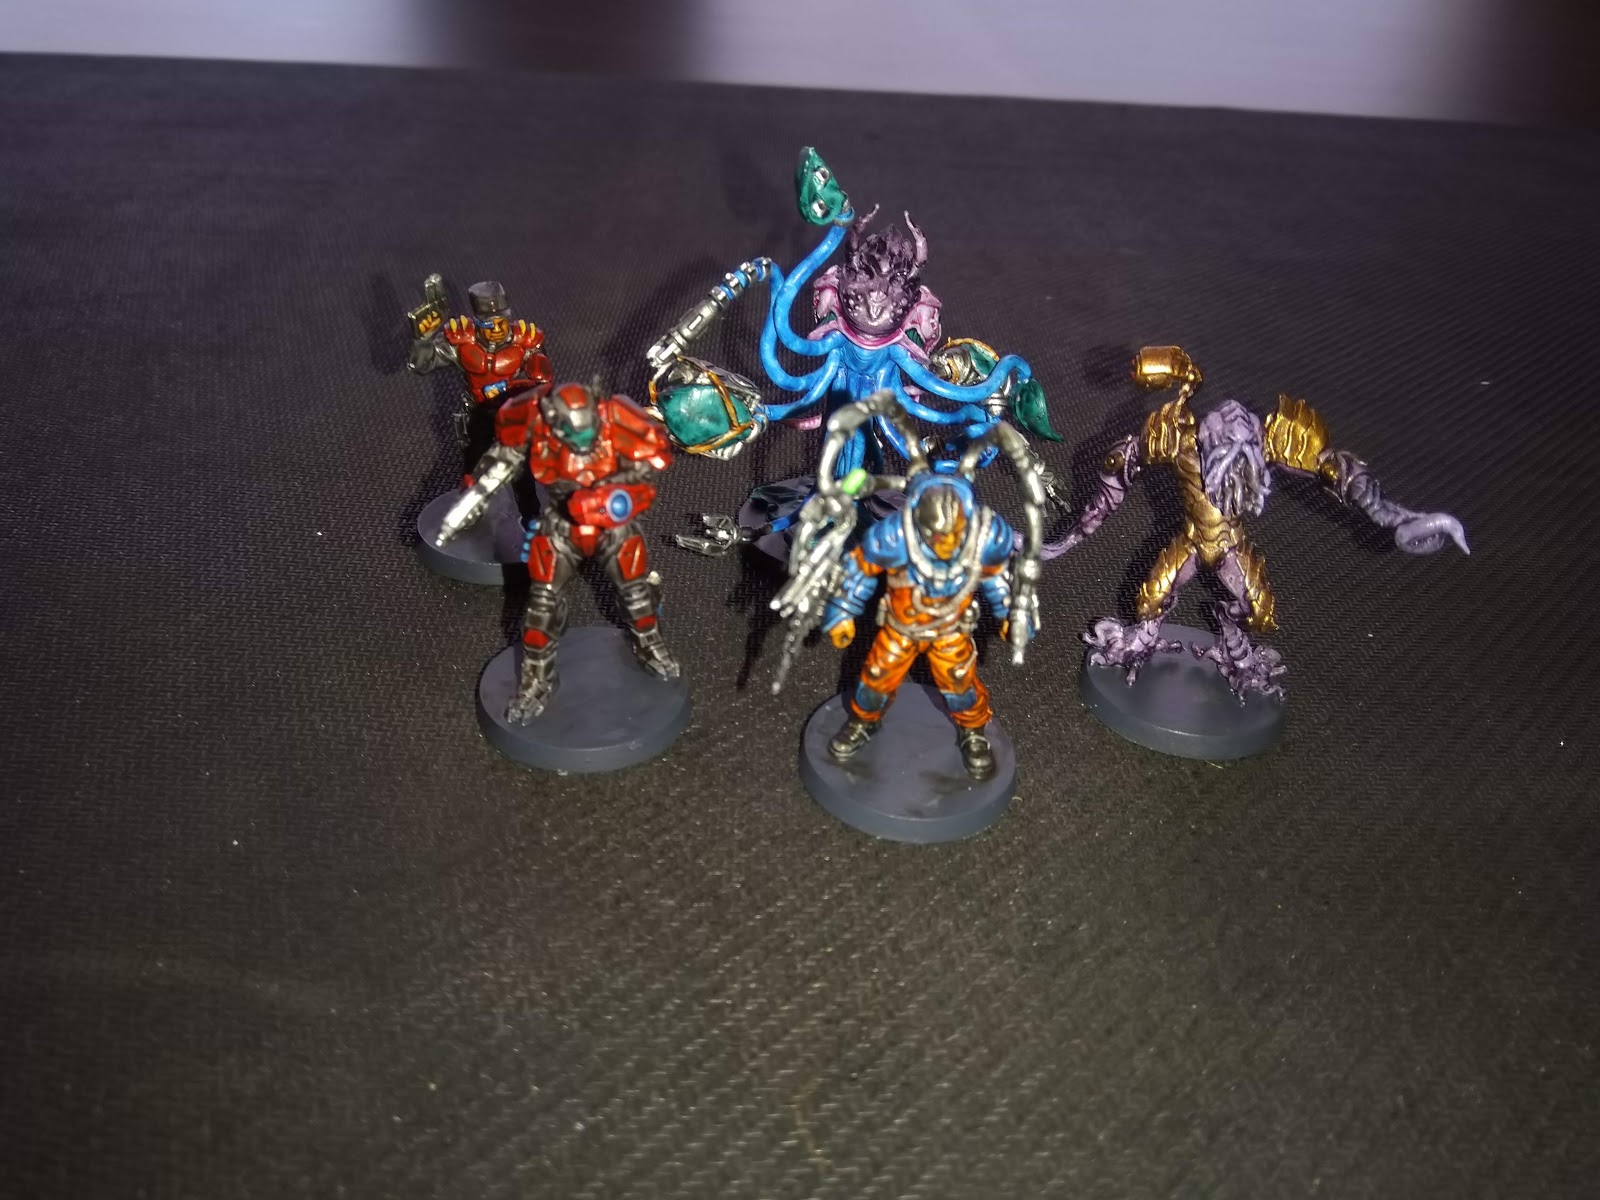
Continuing on with the Mazon Labs models this week I've been able to complete a few different unit types. First up are the Security Guards who are one step up from the Lab Techs completed last week. I'd seen someone else paint these up with red shirts and given the likely-hood that these brave men and women will die I thought I would do the same.


The Security Guards are the slightly more expensive troop choice but still very cheap at only 8 points each. They have a reasonable shoot stat and the ability to pin units down with Rapid Fire means they could be used to let more deadly units get up close.


You get nine of these in the Star Saga set and they should provide a plentiful and expendable force of troops to throw at the mercenaries.


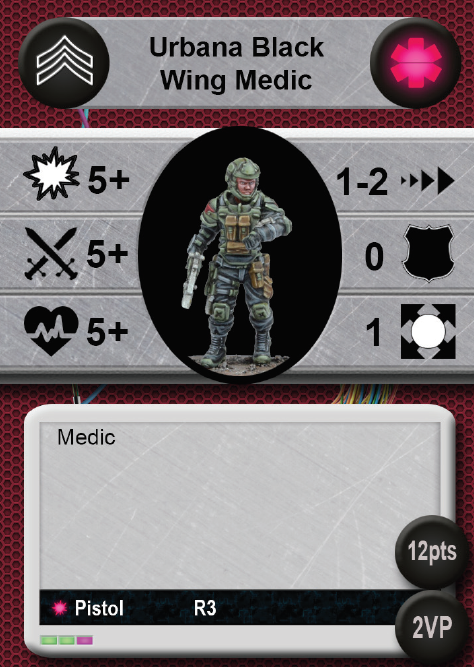
Next up are the Black Wing Marines and Medics. The Marines are the most expensive troop type available to the Mazon Labs with solid stats and a good ranged weapon. These would make the basis of a more elite strike team.


I painted one trio of the models up with white flashes instead of red to be used as medics in Deadzone. The specialists can heal up wounds on other models and also improves the save chance of any model who occupies the same square as them.


The Medic can also be equipped with a Laser Rifle to increase his ranged threat.


The next level up of specialist choices are the Black Wing Rangers, these come in standard and Specialist varieties. As the units have become more elite I have increased the amount of grey and reduced the amount of red in the uniforms to help differentiate the unit types.


The Ranger stats are again solid across the board with the addition of Armour 1 which should help them survive a little longer in the field. Whilst these chaps are pretty expensive the fact that Mazon Labs has cheap unlocking units means you can probably field a fair few and add in some upgraded weapons as well.


The last group I completed this week are the melee specialists, these consist of two Plague units. These are the results of study and experimentation being carried out by Mazon Labs and they sometimes deploy these highly dangerous units in combat zones.


For these models I wanted something a little different from the standard zombie type look so picked up some inspiration from the Liche Queen I painted for the Undead. 


Both these units are dangerous if allowed to get up close by the enemy so having some pinning fire laid down by the cheap Security Guards to cover the advance of the heavy hitters would look like a good basic tactic. The Aberration is a real tank with 5 wounds, armour 1, and Tough meaning it ignores the first wound taken with each attack, it should be very hard to kill. The Victims are fast and again reasonably cheap so a fast melee focused horde style strike team is a possibility.


I still need to complete the bases on these models and should be receiving some further basing supplies soon that should be done in short order. I now just need to complete a leader to put into the strike team and they will be ready to take the field.