Sunday 31 March 2019

A Tale of Two Forts: Capture the Plans

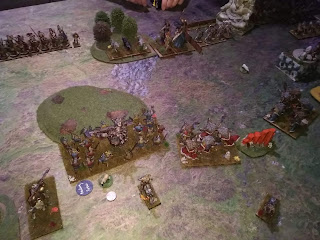
The second Vanguard battle of the campaign saw the two sides trying to take control of some vital plans before the next big clash. The sides would need to reach and search the body before they could see if the plans where still on it, if not then it could be in one of two locations which would be randomly determined at that point.


The Melas Oneiros force consisted of:
1 * Shade with Heavy Weapon - Company Commander
1 * Mind-screech - Arcanist
2 * Shadowhounds
3 * Spectre - including the Quartermaster
3 * Reaper
2 * Shadow
1 * Horror with Spear

This is basically the same force as last time but with a Spear swapped in for some Bandages.


The Argent Defenders fielded a balanced force of :

1 * Veteran Sergeant
1 * Ogre Palace Guard
1 * War Wizard - Salamander Advisor
2 * Sergeants
2 * Paladin Defender
2 * Men at Arms with Spear
2 * Gur Panther
2 * Sisterhood Scout

The Sisterhood Scouts where a late addition and adding up the points now I can see that the Basileans got the numbers wrong and ended up with 259 points rather than 250 (an extra man in effect).


The opening move saw both sides advance cautiously towards the center objective and push their fast troops down the flank towards the objective not already guarded by the Sisterhood Scouts ( they can pre-deploy on the table and guarded one possible location for the plans).


During the next turn my fast troops on the right flank advanced to engage the Scouts in the hope of clearing them away but with a series of disappointing dice rolls they managed to hold on, in fact the lightly armored Scouts went toe-to-toe with my leader and Phantom for the rest of the game without being killed.


In the center the Basileans rushed a Men-at-Arms forward who failing to discover the plans was able to see footprints running towards the objective guards by the Scouts before he was cut down by a hail of Spectre fire. This lead to both forces making a move towards that corner of the table. The Argent Defenders cut a more direct path towards the corner which allowed my troops to move forward and engage them with ranged fire.


In the critical corner my Leader was still bogged down and a Sergeant moved forwards to block off the Hell-hound which was advancing to help whilst some of his comrades rushed into the central group of Melas Oneiros to tie them up.


At this point a Paladin Defender took hold of the plans and I knew it would be difficult to take them back with a direct assault as the Basileans can be very hard to kill if they have the dice for their special defensive ability.


This meant that I needed to get the Argent Defenders to their break point by causing over 50% casualties before round 5 started (6 if I got lucky and we rolled for the extra turn) not an easy task but better than throwing my troops in piecemeal against the enemy.


With four of the Argent Defenders sheltering behind a temple this meant that the Melas Oneiros could group up against the Basileans and once you have a model knocked down it is much easier for an extra person to get the kill. In the end I couldn't get the kills required with the Scouts proving particularly durable.


In the end the Argent Defenders had 7 soldiers standing at the end and held the plans so they secured a Pyrrhic victory which means they gain an advantage in the next big battle.
Once again the Melas Oneiros had suffered no casualties in the battle with the combination of good nerve & armor and also never being outnumbered whilst on the ground being the difference. Having no casualties again also meant that several members got promoted with nine of the company now being rank 1.

As I was visiting Cirencester wargames bunker we also got an extra game in pitting my Herd Vanguard force against the Abyssals. I won't repeat the write-up already done other than to say that the Abyssals look like they could be a real handful for a melee focused opponent so I reckon I need to start breaking out the bow-beasts for the next time.


I also need to not charge my best troops straight into the biggest nasty on the opposition at the start of the game and then lose them all, that makes life pretty hard.


In the end I managed to help the Bard live through the battle and eek out a draw which looked extremely unlikely at the start of turn 2.


I've also been getting some work done on painting as well as all this gaming with my Blood & Plunder Bark hitting the dry dock and being given a lick of paint.


The painting was actually very easy with the colors being blocked in and Army Painter Quickshade doing much of the work (as is my normal method). I added a couple of extra touches from Games of War to help the model look extra nice. The wheel wasn't actually used at this time on boats but just looks right so went on and the anchor looks good as well I think.


The next stage will be to sort out the masts, rigging and sails and then she should be almost ready to take the table, well once I have some models to go along with her of course.


Monday 25 March 2019

Kings of War: Loot

Normally I like to get an update out on a Sunday but yesterday was spent rebuilding my PC, so after the joys of a fresh Win 10 install its nice to spend a little time on the blog!

This week Mick and I played the Push scenario, this places 3 loot tokens along the center line which must be seized and then held onto. The person who controls the most tokens at the end of the game is the winner.


My camera was very unhappy this week with the light and many of the photos turned out next to useless unfortunately. In keeping with my idea to try out some less used troops I went with a chariot/shooting heavy list to see how that went.


The list comprised :
1 * Horde Tribal Spears
1 * Regiment Tribal Hunters
2 * Horde Guardian Brutes
2 * Troop Beast Pack
1 * Horde Tribal Chariots
2 * Great Chieftain on Chariot
1 * Great Totem
1 * Centaur Chief
2 * Mounted Shaman


With most of my shooting concentrated on my right flank I pushed forwards on the first turn in the center and seized a token. On the right I hung back and tried my hand at shooting, without too much effect. This did encourage the Basileans to push forwards into charge range on my right and in the center.


I then used one of the Beast Pack Troops to block the cavalry on the right to get another shot in but again didn't really do much in the way of damage. In the center the Basileans charged in with their Elohi and had a chance to rout one of the Guardian Brute Hordes which they failed to do.


That fight settled into a bit of a grinding match for a couple of turns whilst the Tribal Spears backed up with the token they held. On the right the Chariots got stuck in and took out a Knight Regiment.


The Chariots then got routed by Gneaus and the other Knight Regiment who went on to kill the Hunters and seize the second token with the Sisterhood Scouts picking up the third.


On the Herd left flank the Tribal Spears managed to grind out a victory against the Men-at-Arms Spears as the Ogre Palace Guards finally made it into action.


Back on the right the Herd had more units but with space being short could not make the numbers really count as the Sisterhood Scouts managed to hand off the token to the Knights whilst the War Wizard withstood a charge from a Great Chieftain.


The final act of the game saw the Chieftain charge the Knights but not do enough damage to make a nerve test worthwhile so the Basileans held on for a 2-1 victory.


I've also completed some more of the Mantic Terrain Crate pieces that I purchased with the addition of some market stalls and a couple of law enforcement aids. The stalls are good apart from the legs which despite repeated attempts at heating and setting remained very wonky. I probably should have just cut them away and used wire instead.


The set also came with a couple of wells with a nicely tiled roof. As the Spanish style terrain for Blood & Plunder comes with this terracotta style tiles then these proved to be a good test for a paint scheme.


The set also contained a rather odd shaped column which should make a good bit of blocking terrain on the table. The market has come along nicely and I just need to sort out some houses to go along with the pieces I already have, and maybe a church.


Sunday 17 March 2019

Control - The One With Six Squares

This week Mick & I played out the Control scenario, this divides the table up into six 2*2 foot squares with the points awarded for each square that you control by having the most unit strength in at the end of the game.


As we are getting weekly KoW games in I thought it would be a good chance to try out some units and tactics I wouldn't take a chance on in a campaign game. With this in mind I went with a strong flying force and included the Avatar of the Father who is the Herd's unique monster hero. At 320 points for the winged version he is the same price as a dragon in other lists and I wouldn't normally be tempted.


The list I played was :
1 * Horde Tribal Spears with Iron resolve
2 * Hordes Guardian Brutes
1 * Great Totem
2 * Chimera with Wings
1 * Avatar of the Father with Wings
1 * Shaman with Mount and Healing
1 * Centaur Chief with Bow


The other unit I'd not used before was the Great Totem and I was worried that it would be taken of early so left it within charge range of my initial setup, this fear proved to be unfounded and it gave a nice nerve bubble for my troops contesting the middle of the table, so that seemed to justify the 80 point cost.


I put two of the fliers on my left flank and it was pretty obvious that in order to get the flank charges you need to make the cost of fliers back you do need at least two units operating together to force the enemy to expose a flank. I'm not sure the the Avatar was really worth the extra points over a standard Chimera though having the flying inspire source was nice and he does pack lots of rules in but you would probably do as well swapping him out for the standard Chimera.


The battle itself saw the Basileans initially pin my centre and right wing but I managed to grind out the kills with the help of the extra nerve and some healing in the middle and eventually kill the Elohi on the right. The left flank saw me skipping around with the fliers and the Avatar actually ended up on the right flank to finish off the Elohi and the Chimera rear charged a Ogre Guard Horde to wipe them out, 21 attacks hitting on 3's really hurt.


Mick kept plugging away and despite things looking grim for a while he had a good chance to win when with the final charge of the game he needed to kill my Shaman ( which he did ) and then overrun to contest the centre square, unfortunately he was a couple of inches short on the move and I ended up winning by 1 VP.


I've also been making progress on the seaside terrain and completed some rock formations to act as hazards for shipping, these are from Games of War and are really nice casts, I particularly like the crashing waves on one side of the rocks.


The Hunters Camp is from Mantic and is one of their small terrain crates, the models come in brown plastic that didn't need cleaning and painted up rather nicely. The plastic is good for thick casts but not great for thin ones as I shall show soon.


Last off the blocks is a market stall from Iron Gate who 3D print terrain, being printed the thin parts are nice and straight but you still get the layering effect from the printing process. It doesn't look great close up but looks ok from a normal playing distance.


So now to plan next week's Herd army, I have some Warchief on Chariot proxies so perhaps a rolling thunder list may be on the cards.

Sunday 10 March 2019

A Tale of Two Forts: Push

The second battle of the Tale of Two Forts campaign was a full size KoW battle at the 3000 points mark. In order to accommodate the extra forces I broke out the 2 foot extension so we played across a frontage of 8 feet. As I had won the previous encounter in the campaign I was able to field an additional infantry unit up to the value of 10% of the army, as the Spirit Walker Horde is the most expensive infantry unit the Herd have at 230 points I went with that.
The Salamander viewpoint is documented over on the Cirencester Wargames blog.


My force was pretty much all the Herd units I own with the inclusion of a Guardian Champion who was included to carry the tokens used in the scenario. With nimble, a decent nerve and good defence I thought he would be a good carrier  unit.


The Salamanders started in a clump formation with a few units on their extreme right slightly isolated by the impassable Ganesh statue. They also put on their tokens on one unit which was the Basilean allied Regiment representing the Vanguard force helping out in the big battle. They spent the whole battle giving moral support from the rear lines. In contrast my Nightstalker allied unit was free of such responsibilities and was able to join the main battle line.


The early moves saw the Salamanders hang back as they had the superiority in shooting and my Herd move cautiously forwards making sure I did not overcommit early on. Fortunately the Salamander shooting was spread across the whole front so they could not bring overwhelming firepower to bear on any one unit, this meant that my Shamans could cover most of the damage as it came in, some poor shooting dice from the Salamanders also helped.


It was also at this point that they made a mistake by pushing forwards just enough to move the Basileans up so their flank rested on the Ganesh statue. This meant that when the Salamanders realised they may not be able to push through the middle and carry their tokens across the halfway mark they also did not have enough time to swing out onto the flank and cross the over that way.


With the Salamanders hanging back I was also able to move forwards and seize the fourth token with my Guardian Champion and at this point I made what could have been a costly mistake. Not realising that I still scored 1 victory point per token in my half I pushed him forwards and he started to take fire from the Salamanders.


On the Herd right flank I had been edging forwards and around the refused flank and at the same time as committing in the centre I pushed forwards on the right to try and stop anything from moving over to the centre fight. This was reasonably successful though neither side managed to do much in the way of killing on that flank.


On my left flank the Chariot Horde had managed to lay down some effective fire and the other Salamander heavy cavalry Regiment was kept at arm's length the entire battle. In fact neither of the enemies big hitters were able to really get involved in the game.


The biggest disappointment for me was the Doppelgangers who managed to get tied up in a grind with an archer troop, they natively have a rubbish melee stats and could not steal a better one from the archers.


In the end the Salamanders conceded defeat as it was obvious that they would not be able to carry their tokens across the table and also could not kill my token carrier who had moved out of range, so a 4-3 victory for the Herd.


Next time out we will be playing Vanguard and the Melas Oneiros will be seeking to recapture some plans which have gone astray with the Argent Defenders trying to steal the plans for themselves.