Showing posts with label Salamanders. Show all posts

Sunday, 26 May 2024

Kitchen Tables for Battlefields

As the building work continues we once again went old school with some kitchen table gaming. Fortunately Deadzone is perfect for playing in a restricted space as the playing area is only 2" square.

With an even coming up very soon Mr T and myself are still working on exactly what lists to take so things are a little experimental. 


PSYCHOTROID
[Leader / +36 / 4VP] Psychotroid 
 - - Brain Freeze 
 - - Mind Control 
 - - Hyperkinesis 

INKER
[Troop / +8 / 1VP] Inker 
 - - Teeth 

SCUTTLER
[Troop / +7 / 1VP] Scuttler 
 - - Pincers 

GUNSLINGER
[Troop / +13 / 1VP] Gunslinger 
 - - Twin Crystal Pistols 

RIFLEMAN * 2
[Troop / +15 / 1VP] Rifleman 
 - - Crystal Rifle 

CARATID * 3
[Specialist / +17 / 2VP] Caratid 
 - - Razor Claws 

BATHOMITE
[Support / +35 / 4VP] Bathomite 
 - - Massive Claws 
 - - Crystal Cannon 


THORGARIM HUSCARL
[Leader / +28 / 2VP] Thorgarim Huscarl 
 - - Hailstorm Pistol 
 - - Heavy Forge Hammer 

STEEL WARRIOR
[Troop / +17 / 2VP] Steel Warrior 
 - - Mk2 Hailstorm Rifle 
[Specialist / +19 / 3VP] Brakkarim 
 - - Hailstorm Autocannon 

BROKKR
[Troop / +16 / 1VP] Brokkr 
 - - Burst Pistol 
 - - Forge Hammer 
 - - [+2] Ammo [one-use] 

BOMB BOT
[Troop / +6 / 0VP] Bomb Bot 
 - - Bomb Bot 

FORGE GUARD
[Specialist / +30 / 3VP] Forge Guard Issilgarim 
 - - Forge Hammer 
 - - Magma Cannon 

THORGARIM *2
[Troop / +17 / 2VP] Thorgarim 
 - - Heavy Forge Hammer 

HAMMERFIST DROP TROOPER
[Specialist / +30 / 2VP] Hammerfist Drop Trooper 
 - - Forge Hammer 
 - - Inferno Drill 


We played the Deepstrike mission that sees ranges restricted on turn 1 and deeper than normal  deployment zones in opposite corners. For the Nameless the Caratid's have been working really well for me and they have so far been more than able to hold their own in melee against the best the Forge Fathers have to offer. The Psychotroid has been less impressive and the ability you seem to take it for (Hyperkinesis, removes activation marker from target) is unreliable as you need two 5+'s on 3D8. I think that taking the more reliable melee abilities of The Blight is the way I will go for the event.


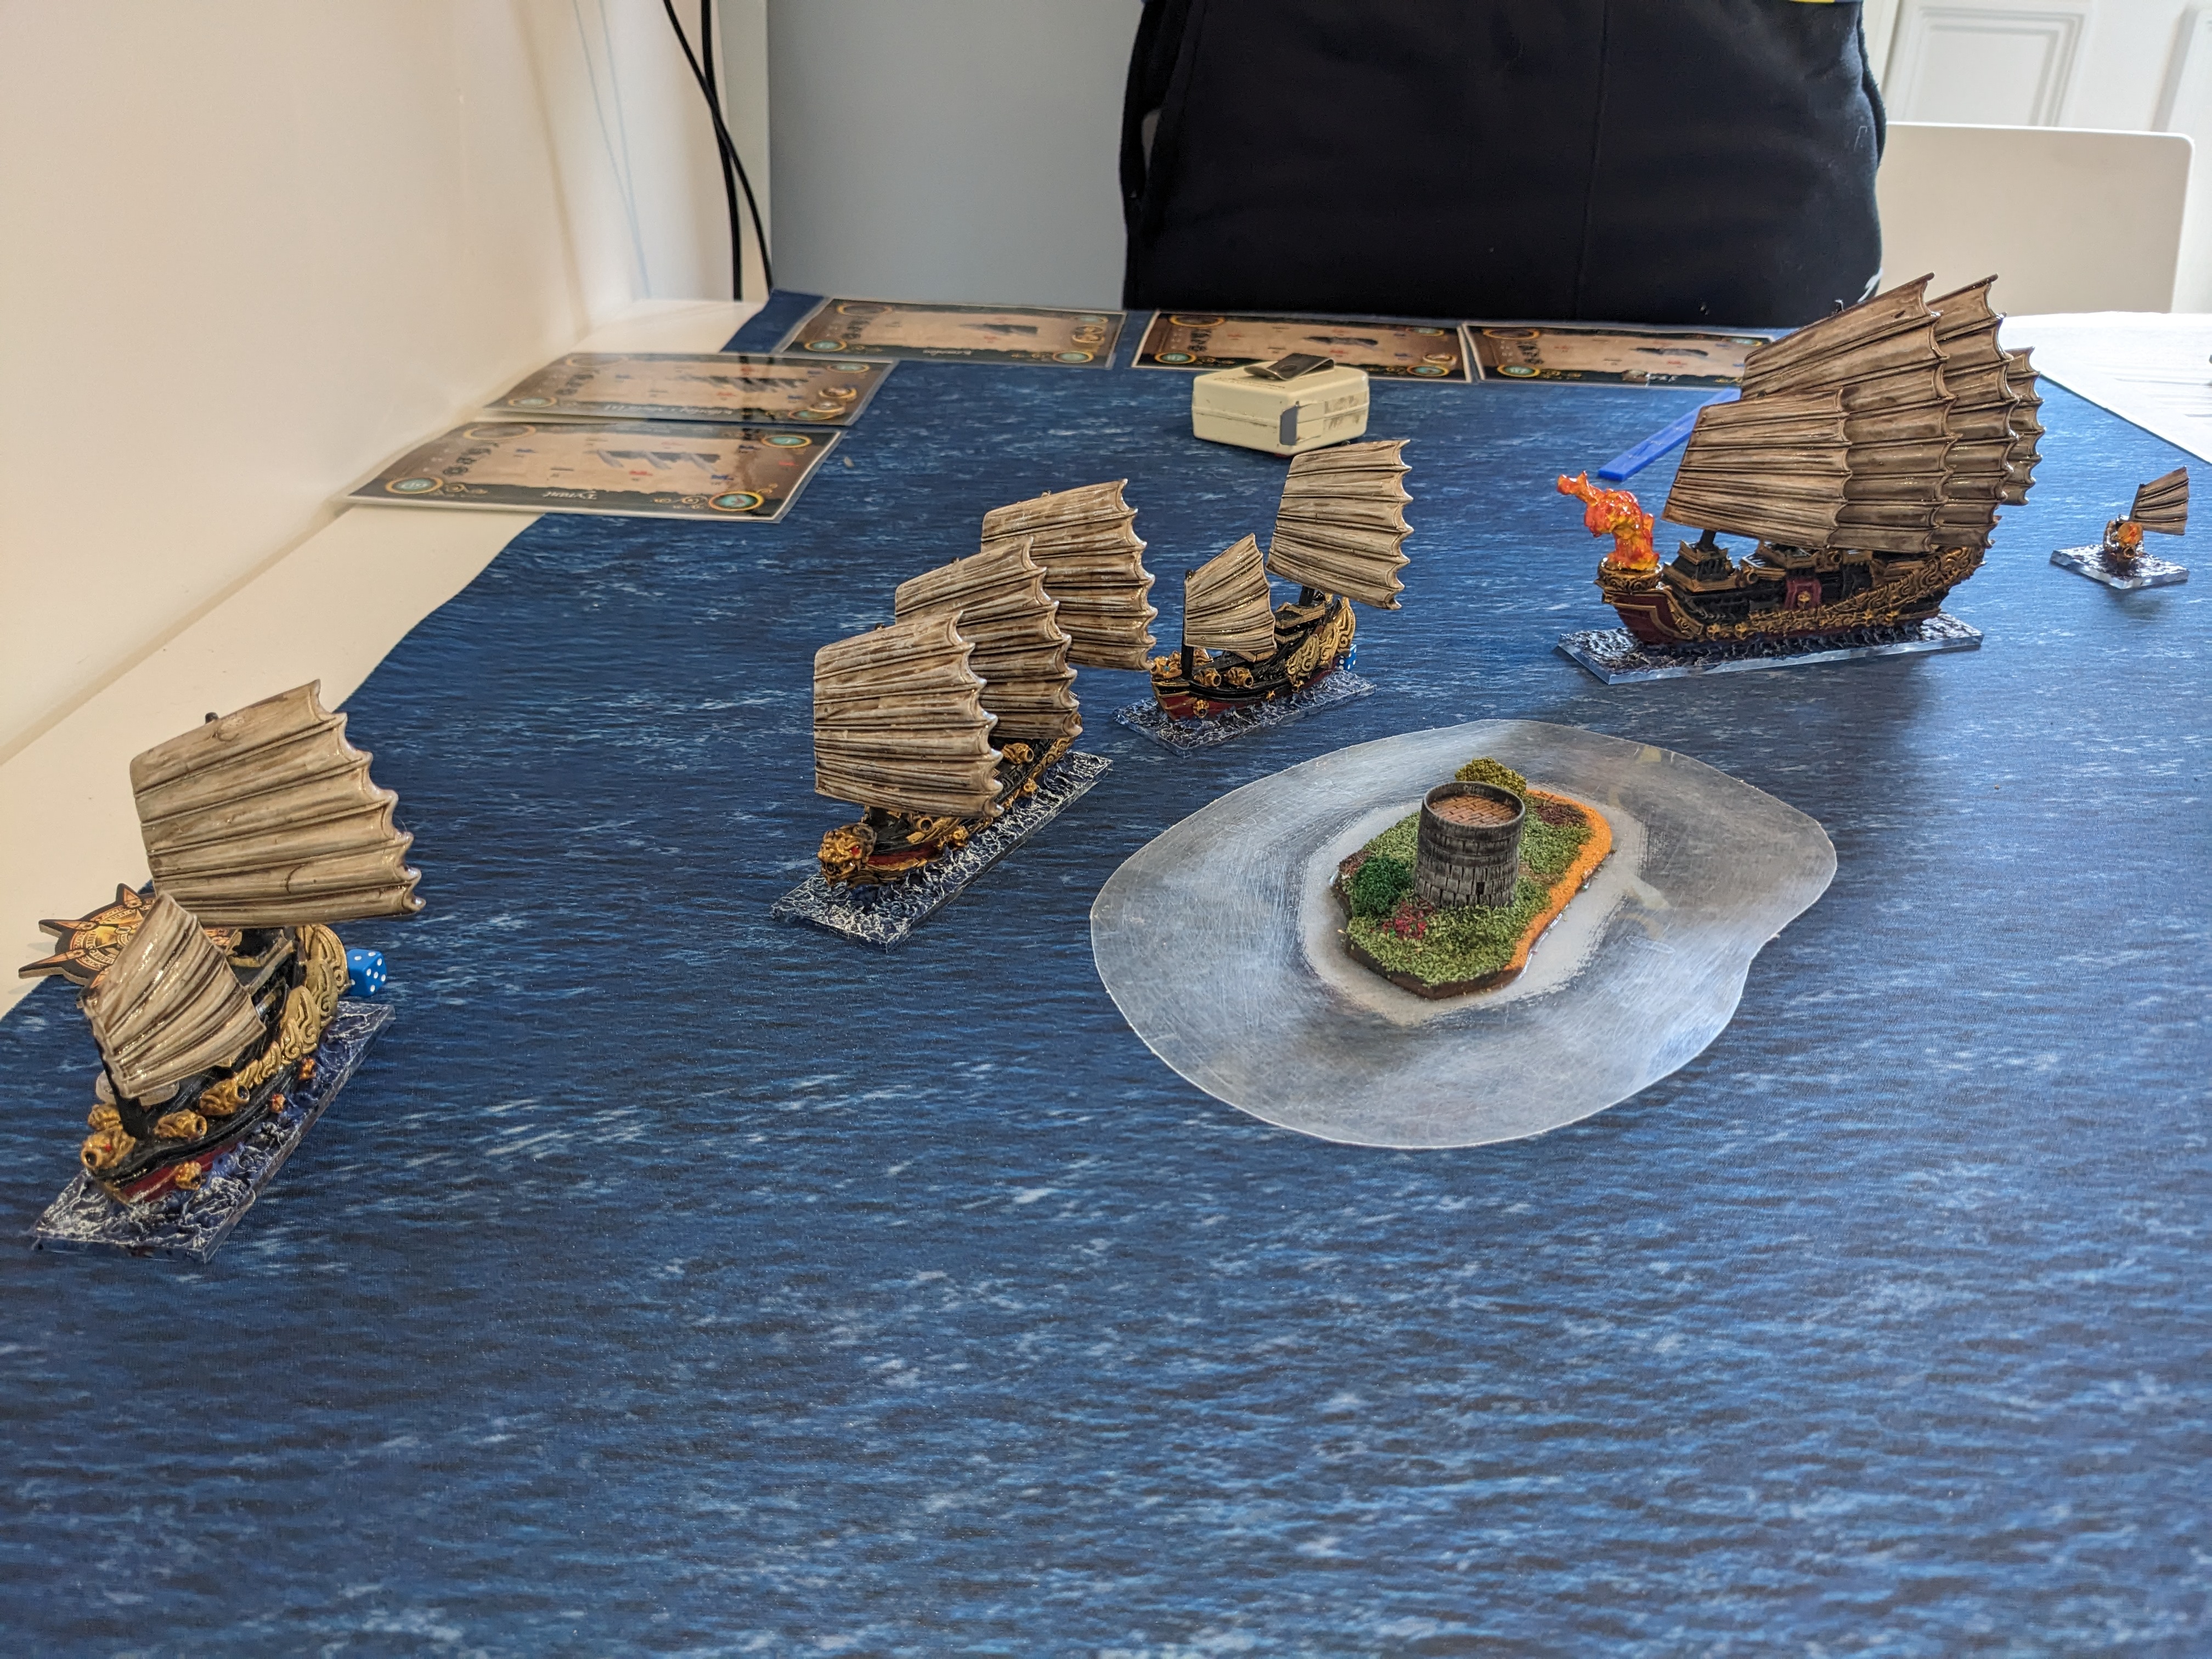
The second game of the weekend was Armada which is a bit more of a squeeze on the table I have available but still perfectly playable.
We played the Smugglers run scenario which sees the two sides distribute loot tokens across their fleets and then they need to time their run to a endzone to end up with the loot carry ships in the zone after 6 turns.


KTHORLAQ'S SHIELD (Main Battle Ship) [103]
Regular Crew
Red Hot Shot, Firebrand, Brew of Strength

TYRANT (Main Battle Ship) [64]
Regular Crew
Boarding Nets, Ogre Mercenaries

J'KOOR'UK (Main Battle Ship) [28]
Regular Crew

J'KOOR'UK (Main Battle Ship) [28]
Regular Crew

HERALD (Support Ship) [20]
Regular Crew

WARDEN SQUADRON (Support Ship Sq) [7]
Regular Crew


RIPPER HULK (Main Battle Ship) [129]
Veteran Crew
Grappling Hooks, Morax, Morguns, Yinn Greythunder, War Drum of Spite

SMASHER (Main Battle Ship) [65]
Regular Crew
Grappling Hooks, Morax

BLOOD RUNNER (Support Ship) [16]
Regular Crew

BLOOD RUNNER (Support Ship) [16]
Regular Crew

BOMBBOAT (Support Ship) [19]
Regular Crew
Boarding Nets

RABBLE SQUADRON (Support Ship Sq) [5]
Inexperienced Crew


This means that you don't want your loot carries to arrive into the endzone too early which gives you a chance to try and disrupt the enemy ships trying to do the same. It also means you can't really avoid the enemy as you are all heading towards the same zone.


The game saw the two XL ships trading some early blows with the Orcs short range being balanced by the Salamanders poor gunnery skills.


The Orc XL did manage to dispatch the Salamander Tyrant but it proved to be carrying to bluff tokens rather than actual loot.


On the last turn of the game the one of the Orc's tokens was stuck outside the endzone but with a last gasp it managed to deliver a fatal broadside to a Salamander ship carrying 1 token to eek out a draw.


Sunday, 12 May 2024

Double Header

With the building work still ongoing this week I went old school and did some kitchen table gaming. 

With a Deadzone event in Banbury coming up on the 9th June Mr T and myself broke out our strike teams to refresh our Deadzone skills. Fortunately Deadzone plays on a 2*2feet table so it's perfect for when you want to game but don't have any space to play in.


The event is at 180 points so we both fielded a strike team at that points level, Mr T sticking with his trusty Forge Fathers and I took my freshly painted Nameless for a spin.


The Goliath is a real melee beast of a unit and it proved it's worth by chewing through a good proportion of the Forge Father list which meant I came away with a win. I suspect the secret of combating it is to slow it down via pins/flames and try to take out the units around it rather than charging into it's range.


Stu also came over from Cirencester for a game of Armada with my Orcs going up against his Salamanders. The scenario involved picking up loot tokens and we ended up with 4 VP's each and the Salamanders took off around an island.  


My Orcs couldn't catch up with the main part of the fleet but did manage to pick off the two smallest ships in the enemy fleet, so it was a moral victory even if the VP's ended up tied.


Monday, 1 April 2024

Armada: Multi-player Vortex

 We've been playing a fair bit of Armada lately and I hosted Stu & Mr T today in a three player game of Vortex. The aim of the scenario is to get close enough to a vortex to draw power from it but not so close as to be destroyed. At the end of each turn any ship within 8" is moved D3" towards the vortex and if it ends up touching the vortex then it's immediately destroyed.


Stu gave his Salamanders there first outing and in the end they took away the victory for him so presumably he's happy with his fleet. The Salamanders seem to concentrate mostly on their ranged attacks with a good number of guns on the broadside and also have some useful indirect weapon support. 


The initial moves saw the Abyssal Dwarfs close in on the vortex and start building a lead but this also meant they took fire from both fleets and started to suffer losses.


Two of my ships where forced to go wide by the presence of the Arbiter of Pain and the Impaler never really got into the action, the Assassin did score some victory points and after going the long way around captured a Salamander ship at the end of the game.


The Salamanders arrived late to the centre but then started to wrack up the points as the Abyssal's and Twilight Kin started to lose ships.


In the end they ran out the winners with the Abyssal Dwarfs second and my Twilight Kin in last place.


Sunday, 10 November 2019

On the Deep Blue Sea

This week Mick & I took to the waves in our first naval battle for Blood & Plunder. The rules treat ships as structures that can move, so all the earlier rules we had learnt in the land battle still applied and we 'just' needed to add the ship movement on top. This took a while to explain but once we got playing it actually flowed very well and we got stuck in and had a good game.


For this game I stacked up on the guns for the ships but you could equally build a boarding focused list as the rules include the ability to grapple the opposition.


Mick's early cannon fire proved to be very effective with him scoring multiple lucky hits which left my ship leaking and in need of repair. Fortunately I was able to effect a speedy repair and stopped my ship for sinking below the waves.


At one point my cannons decided to work and I briefly started a fire on Mick's ship but he was able to task some sailors to put that out in short order.


By the end of the evening the casualties where about even but my ship had taken much more damage in the fire-fight. One thing we did find out was that musket fire is still pretty effective even when firing to and from a ship so taking good musket troops is useful in a ship combat game.


Last week along with visiting Mantic HQ for their open weekend we also played out the final game of our KoW v2 campaign. Having won the majority of the big battles I was the attacker and Stu brought along his castle which his Salamanders occupied.


I won't repeat the details of the battle which can be found over here but I committed a reasonable strong force to attack the castle with a view to taking down the front wall with my massed artillery and then put everything else opposite the forces outside the castle.


The Salamanders had a lot of points inside the castle so I was able to outnumber those on the outside and made good inroads into killing them off.


I was also lucky with the artillery and managed to take the wall down but I lacked the strength to clear the courtyard against the massed defenders.
The game ended in a draw with neither side looking likely to be able to gain a victory, a good way to end a keenly contested campaign and see off the old armies in style.


With the Herd being the old army that means work has been continuing on the new one!
I'm into the home run with the Undead and have been busy getting the Skeleton Hordes painted up. At 30 models a unit these take a fair old bit of painting but I have managed 1 1/3 Hordes so far.


The infantry are all Mantic models and they have a lot of character especially considering how cheap they are, so it hasn't been a drag to paint them so far.


The plan is to glue them into place and then level things off with some polyfilla & paint before applying the cracked earth effect.