Showing posts with label Forge Fathers. Show all posts

Sunday, 26 May 2024

Kitchen Tables for Battlefields

As the building work continues we once again went old school with some kitchen table gaming. Fortunately Deadzone is perfect for playing in a restricted space as the playing area is only 2" square.

With an even coming up very soon Mr T and myself are still working on exactly what lists to take so things are a little experimental. 


PSYCHOTROID
[Leader / +36 / 4VP] Psychotroid 
 - - Brain Freeze 
 - - Mind Control 
 - - Hyperkinesis 

INKER
[Troop / +8 / 1VP] Inker 
 - - Teeth 

SCUTTLER
[Troop / +7 / 1VP] Scuttler 
 - - Pincers 

GUNSLINGER
[Troop / +13 / 1VP] Gunslinger 
 - - Twin Crystal Pistols 

RIFLEMAN * 2
[Troop / +15 / 1VP] Rifleman 
 - - Crystal Rifle 

CARATID * 3
[Specialist / +17 / 2VP] Caratid 
 - - Razor Claws 

BATHOMITE
[Support / +35 / 4VP] Bathomite 
 - - Massive Claws 
 - - Crystal Cannon 


THORGARIM HUSCARL
[Leader / +28 / 2VP] Thorgarim Huscarl 
 - - Hailstorm Pistol 
 - - Heavy Forge Hammer 

STEEL WARRIOR
[Troop / +17 / 2VP] Steel Warrior 
 - - Mk2 Hailstorm Rifle 
[Specialist / +19 / 3VP] Brakkarim 
 - - Hailstorm Autocannon 

BROKKR
[Troop / +16 / 1VP] Brokkr 
 - - Burst Pistol 
 - - Forge Hammer 
 - - [+2] Ammo [one-use] 

BOMB BOT
[Troop / +6 / 0VP] Bomb Bot 
 - - Bomb Bot 

FORGE GUARD
[Specialist / +30 / 3VP] Forge Guard Issilgarim 
 - - Forge Hammer 
 - - Magma Cannon 

THORGARIM *2
[Troop / +17 / 2VP] Thorgarim 
 - - Heavy Forge Hammer 

HAMMERFIST DROP TROOPER
[Specialist / +30 / 2VP] Hammerfist Drop Trooper 
 - - Forge Hammer 
 - - Inferno Drill 


We played the Deepstrike mission that sees ranges restricted on turn 1 and deeper than normal  deployment zones in opposite corners. For the Nameless the Caratid's have been working really well for me and they have so far been more than able to hold their own in melee against the best the Forge Fathers have to offer. The Psychotroid has been less impressive and the ability you seem to take it for (Hyperkinesis, removes activation marker from target) is unreliable as you need two 5+'s on 3D8. I think that taking the more reliable melee abilities of The Blight is the way I will go for the event.


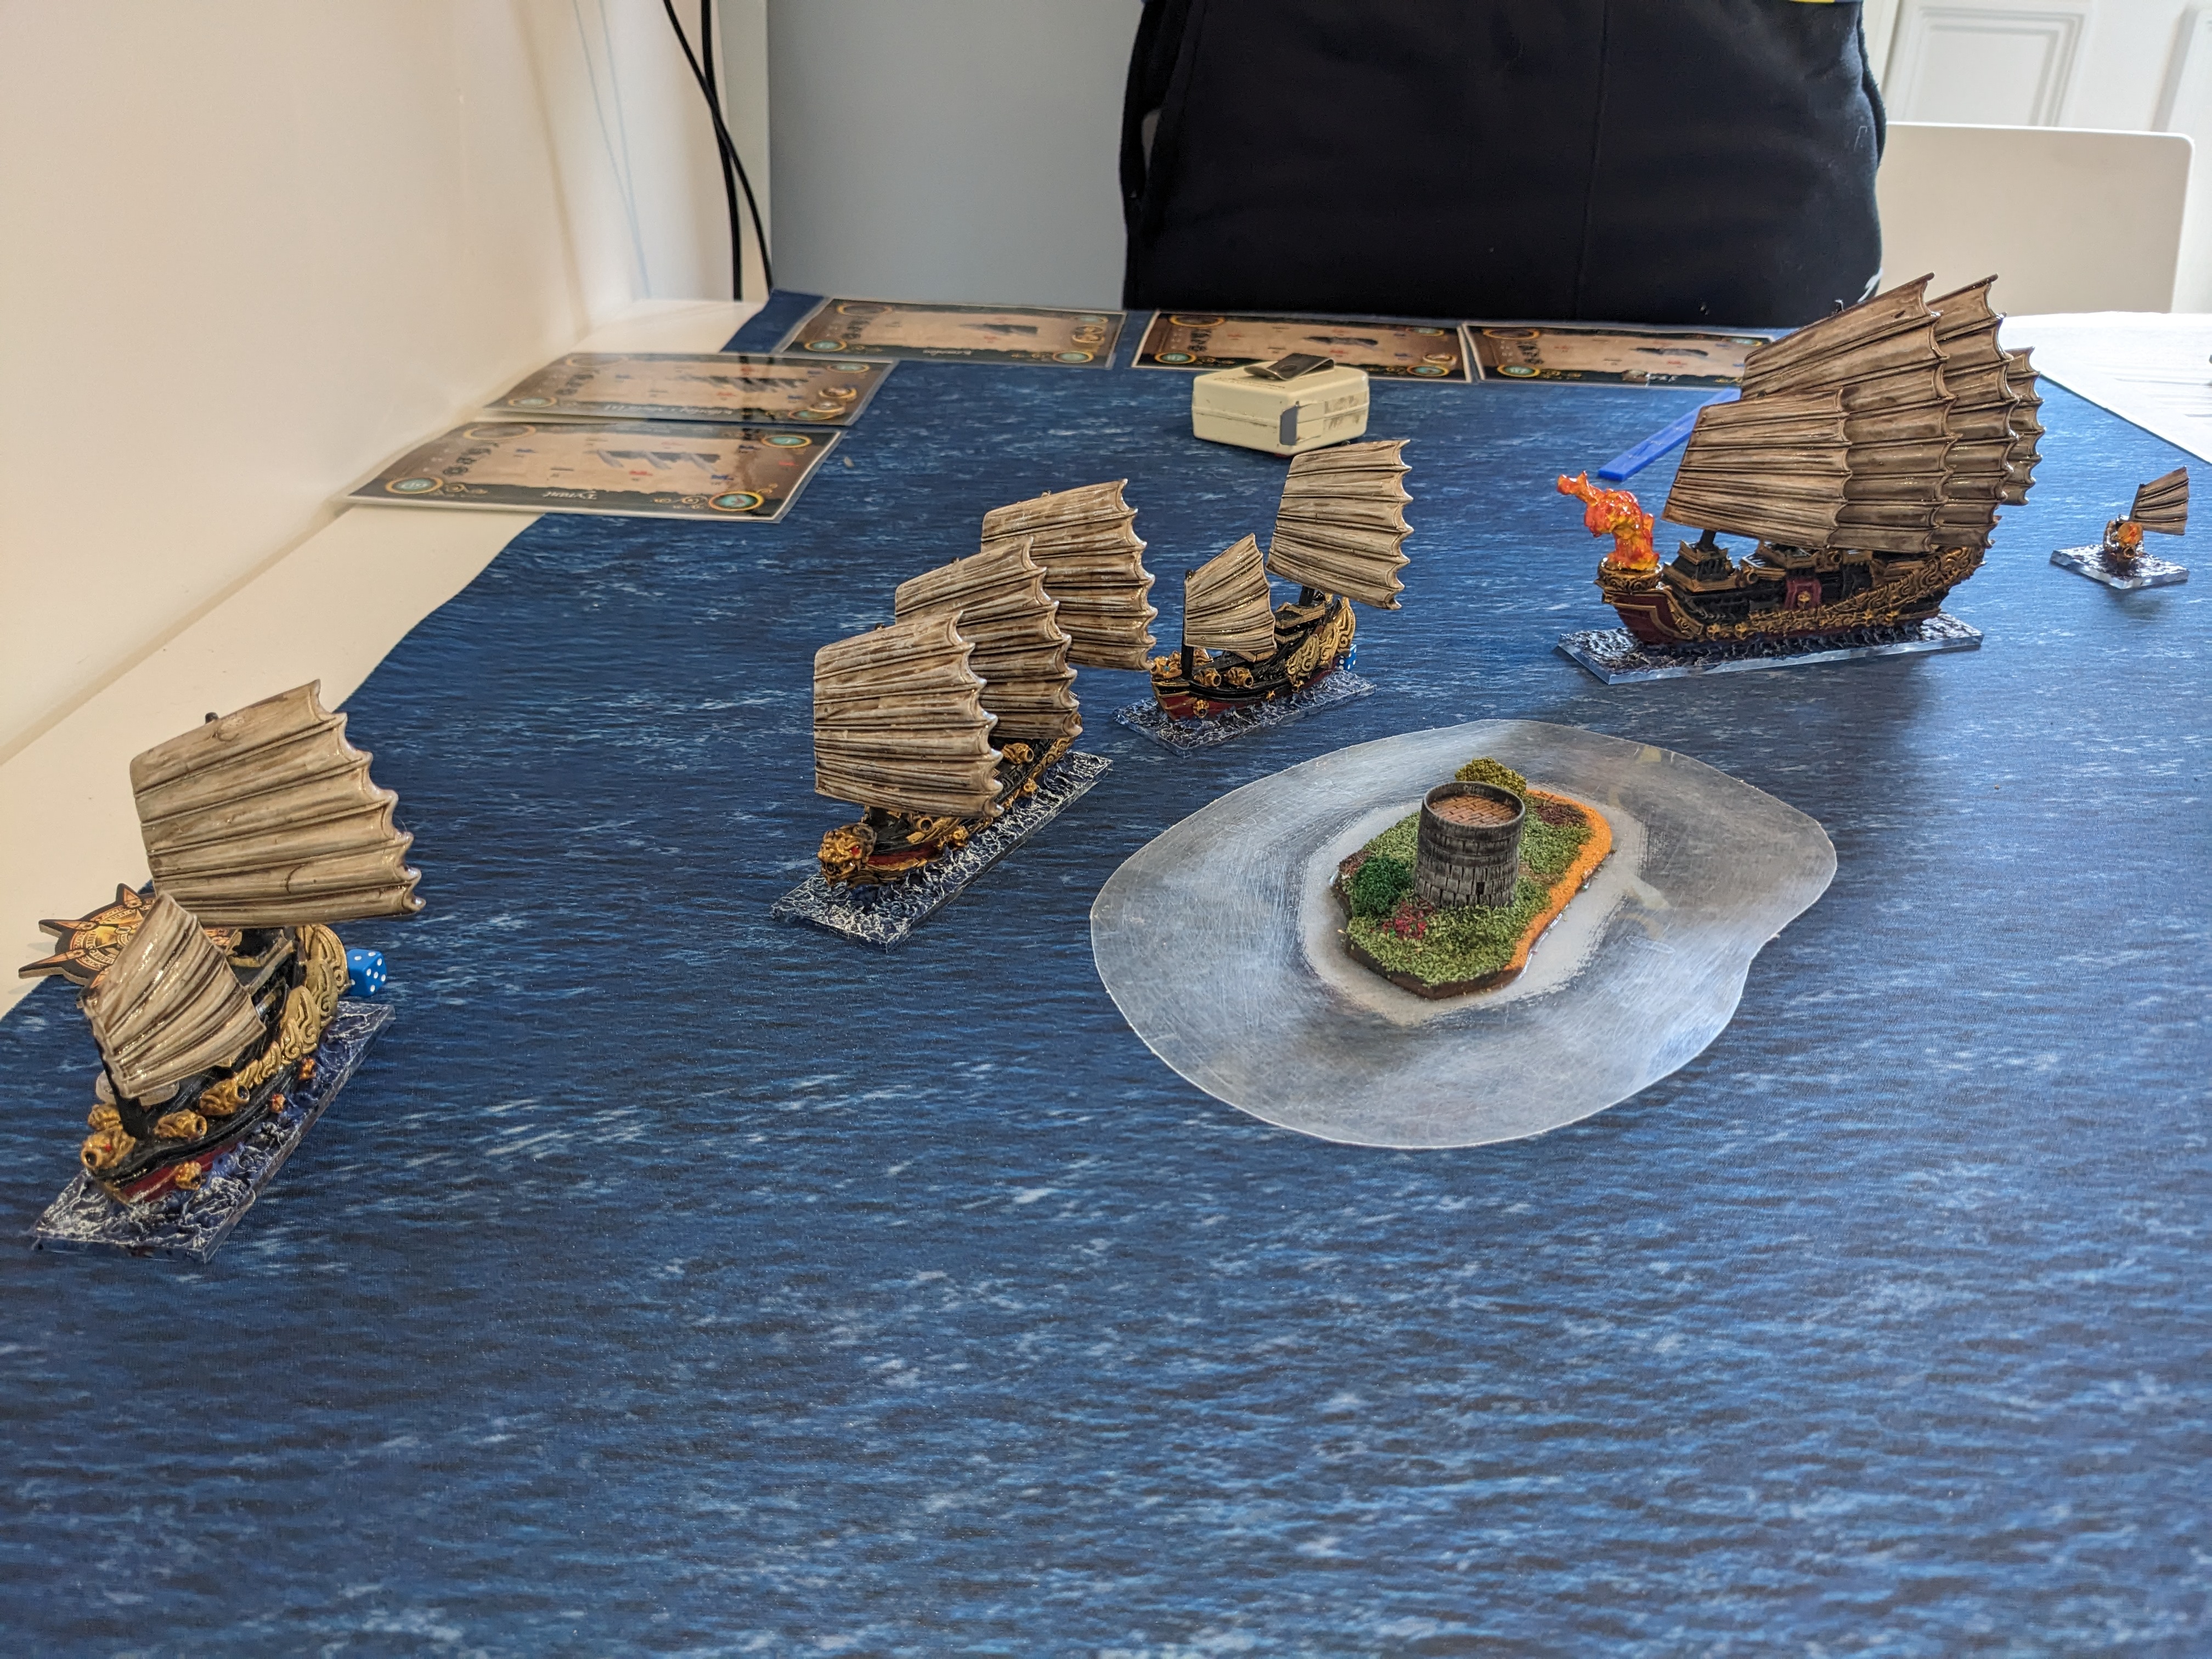
The second game of the weekend was Armada which is a bit more of a squeeze on the table I have available but still perfectly playable.
We played the Smugglers run scenario which sees the two sides distribute loot tokens across their fleets and then they need to time their run to a endzone to end up with the loot carry ships in the zone after 6 turns.


KTHORLAQ'S SHIELD (Main Battle Ship) [103]
Regular Crew
Red Hot Shot, Firebrand, Brew of Strength

TYRANT (Main Battle Ship) [64]
Regular Crew
Boarding Nets, Ogre Mercenaries

J'KOOR'UK (Main Battle Ship) [28]
Regular Crew

J'KOOR'UK (Main Battle Ship) [28]
Regular Crew

HERALD (Support Ship) [20]
Regular Crew

WARDEN SQUADRON (Support Ship Sq) [7]
Regular Crew


RIPPER HULK (Main Battle Ship) [129]
Veteran Crew
Grappling Hooks, Morax, Morguns, Yinn Greythunder, War Drum of Spite

SMASHER (Main Battle Ship) [65]
Regular Crew
Grappling Hooks, Morax

BLOOD RUNNER (Support Ship) [16]
Regular Crew

BLOOD RUNNER (Support Ship) [16]
Regular Crew

BOMBBOAT (Support Ship) [19]
Regular Crew
Boarding Nets

RABBLE SQUADRON (Support Ship Sq) [5]
Inexperienced Crew


This means that you don't want your loot carries to arrive into the endzone too early which gives you a chance to try and disrupt the enemy ships trying to do the same. It also means you can't really avoid the enemy as you are all heading towards the same zone.


The game saw the two XL ships trading some early blows with the Orcs short range being balanced by the Salamanders poor gunnery skills.


The Orc XL did manage to dispatch the Salamander Tyrant but it proved to be carrying to bluff tokens rather than actual loot.


On the last turn of the game the one of the Orc's tokens was stuck outside the endzone but with a last gasp it managed to deliver a fatal broadside to a Salamander ship carrying 1 token to eek out a draw.


Sunday, 12 May 2024

Double Header

With the building work still ongoing this week I went old school and did some kitchen table gaming. 

With a Deadzone event in Banbury coming up on the 9th June Mr T and myself broke out our strike teams to refresh our Deadzone skills. Fortunately Deadzone plays on a 2*2feet table so it's perfect for when you want to game but don't have any space to play in.


The event is at 180 points so we both fielded a strike team at that points level, Mr T sticking with his trusty Forge Fathers and I took my freshly painted Nameless for a spin.


The Goliath is a real melee beast of a unit and it proved it's worth by chewing through a good proportion of the Forge Father list which meant I came away with a win. I suspect the secret of combating it is to slow it down via pins/flames and try to take out the units around it rather than charging into it's range.


Stu also came over from Cirencester for a game of Armada with my Orcs going up against his Salamanders. The scenario involved picking up loot tokens and we ended up with 4 VP's each and the Salamanders took off around an island.  


My Orcs couldn't catch up with the main part of the fleet but did manage to pick off the two smallest ships in the enemy fleet, so it was a moral victory even if the VP's ended up tied.


Sunday, 23 April 2023

Firefight: Control the Intel

Following on from last weeks musings about the scenario's on offer in Firefight we played Control the Intel this week. The scenario is based around holding 1d4+2 objective tokens with 1VP being awarded at the end of each round for each objective your side holds.


We increased the points to 1250 a side with the though of adding some armoured units in and filling up the table a bit more. It looks like the standard competitive game is going to be around 1500 points so it would be good to get that as our normal game size. At the moment we aren't getting through the turns very quickly as we learn the rules and look things up.


On the night we only managed to get through two turns in the end as we spent time trying to work out rules queries and how best to use our units at any one point. But as with the previous games lots of casualties had been caused in that time so the end was reasonably clear.


In the game itself Mr T put his two tokens on his right flank and I put my three tokens (we rolled for 5 tokens and took turns with me placing first) on my right flank as well. This meant that we had nothing in the centre to fight over.


In the game I took a Progenitor with smoke grenade launcher for the first time in order to try and cover the advance of my forces. I chose to activate it first and got lucky with the dice (1d10 needing a 5+) to lay out the smoke template I needed in front of a large portion of my army. With that in place it allowed my rats to move up without being shot into charge range. In most games you can't charge something out of your line of sight, but in Firefight you can. Doing so does 'Hinder' your charge which means you don't get a +1 to hit but the Veer-myn have a command ability that negates that and allows you to take the bonus. The smoke is only height 4 though so tall/flying units and hills will negate that advantage.
Whilst Firefight borrows from KoW in many respects including the term Hindered Charge it treats them in different ways, which I kept getting wrong. In KoW being Hindered makes it more difficult to hit so if you normally hit on a 4+ then you'd hit on a 5+. In Firefight being Hindered means you don't get the bonus for charging which would mean that if you normally hit on a 4+ you hit on a 3+ if Unhindered. As a player of a melee army this is one rule I really need to get right!


The game also showed me the importance of being able to activate after your opponent has run out of activations to a melee army. Most of the Forge Father units have Assault Reaction abilities that they can use if they are unpinned and un-activated. That means if they are charged after they have activated the assaulters can get in without fear of taking casualties or the opponent evading away in the case of the bikers. On my right I held back units to run the Forge Father activations down until they had to either sit and take the charge or retreat out of my range.


As ever with the learning games I/we got some of the rules wrong like the un-hindered charge bonus. I got two rules wrong on the Tunnel Runners as I'd not realised they couldn't charge into rough terrain and also thought they got a Scout move if deployed on the table at the start of the game. The scout move is actually for units with Aerial Deployment.


Other things to keep in mind is that Beast and Vehicle units cannot claim objectives so for army building the Veer-myn will need to be careful not to overload on both those unit types. The Rat Swarm is a really useful activation padder as it's a Troop choice for only 35 points. But they cannot claim objectives so you need other units to do that.


One unit that put an appearance in right at the end of the game was the Hammerfist Drop troops. I think this will be a really useful unit for the Forge Fathers as it gives them the ability to place a good shooting/melee unit anywhere on the table pretty much. This could be a real utility piece for them as it makes their opponent keep it in mind when moving about and allows some flexibility to react to the table situation.


Saturday, 8 April 2023

Firefight: Initial Game

For our first play through of the Firefight rules by Mantic Games Stu popped over from Cirencester and took control of the Forge Fathers against my Veer-myn. The Dwarfs specialise in ranged combat whilst the Rats like to mix it up in melee combat.


For this first game we kept it very simple with no tanks or buildings and 1000 points per side. The Forge Father units are pretty expensive compared to the Veer-myn so they tend to have smaller units armed with a special weapon or two.


2 * Steel Warrior Huscarls
2 * Steel Warriors- 4 * Rifle, 2 * Missile Launcher
1 * Steel Warrior - 4 * Rifle, 2 * Autocannon
1 * Thorgarim - 8 * Hammer & Pistol
1 * Brokkr Valkyr - 3 * bikes
1 * Jotunn Weapons Platform with Hailstorm Cannon


The Veer-myn tend to have larger units with their main Troop options locked to 10 rat units rather than having the flexibility in unit size many other factions have.

2 * Master Creeper
3 * Stalkers - 1 * Chem Thrower, 9 * Ray Pistol & Dagger
1 * Crawlers - 1 * Heavy Ray Gun, 9 * Ray Gun
1 * Nightmares - 2 * Heavy Drill, 4 * Twin Drills
1 * Clawshots - 5 Long Rifles
1 * Tunnel Runner - 2 * Tunnel Runners
1 * Rumbler - Super Heavy Ray Gun


Both sides had two commanders of the same type who generate command dice and offer re-rolls on nerve checks. Command dice are rolled at the start of each turn and give you Command Points to spend as the turn plays out. Each faction has it's own special command abilities that tie into it's play style. So the Forge Fathers have abilities that generally help with shooting by way of re-rolls. The Veer-myn have abilities that help with melee again via re-rolls or helping them get into combat in the first place.


Games are limited to 5 turns with players taking turns to activate a unit each. This trading of activations can be interrupted, at the price of 1 command point, to allow you to immediately activate a second unit before your opponent gets an activation. This allows you to land a quick one-two on an opponent before they can react.


We managed to play out 3 turns in the morning with plenty of flicking through the rule book to check rules which I think we got mostly right. The rules benefit by being written by someone (Andy Sharp) who has played all the other Mantic systems so they have a consistency of rules naming and conventions from their other games. For instance, Weight of Fire (re-rolls for missed ranged shots) works exactly as it does in Deadzone and Vicious (re-rolls to wound) works the same as Kings of War. For people who have played the other Mantic systems this makes it very easy to pick up what a rule should be doing and get into the game.


I'd read on the Firefight Facebook Group that the game was very bloody and units tended to be removed very quickly, and this proved to be the case in our game. I won't go through a blow-by-blow but in general the Forge Fathers managed to shoot off the rats if they put more than one unit into the shooting and the Veer-myn managed to take off the Dwarfs if they could get a decent number of bodies into contact. 
One area the Forge Father had a definite advantage was in nerve rolls. If at the end of a turn a unit is at less than 1/2 of it's models remaining it rolls 1 dice (the game uses D8 for everything) needing to equal or pass it's nerve roll or be removed from the table. The Forge Fathers tend to have a 4+ nerve and the Veer-myn a 6+. If you have a leader or other Inspiring source nearby you get a re-roll (just like in Kings of War).


The game was fun over-all and as I've said the fact that many of the concepts are familiar I think it won't take many games to be able to dispense with the rule book for 99% of play. Hopefully Mr T will be over on Monday for his initial game so we will be using the same forces and table for that as I've just left them all out.


Once that game is played we can then start to play around with the force composition. I think I will certainly be looking to maximise the use of tunnelling vehicles to deliver my key melee units into combat. The fierce beating my rats took trying to cross open ground has convinced me of the need to avoid that if at all possible. We did play with the beta list adjustments which almost entirely removed the Veer-myn's access to smoke which would have meant they could more easily traverse the open ground. In the absence of that smoke then heavier use will I think need to be made of Tunnellers with transport sections.