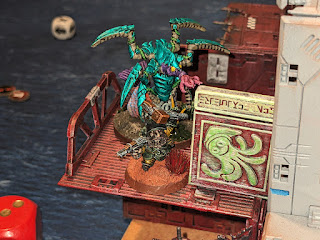
As the building work continues we once again went old school with some kitchen table gaming. Fortunately Deadzone is perfect for playing in a restricted space as the playing area is only 2" square.
With an even coming up very soon Mr T and myself are still working on exactly what lists to take so things are a little experimental.
PSYCHOTROID
[Leader / +36 / 4VP] Psychotroid
- - Brain Freeze
- - Mind Control
- - Hyperkinesis
INKER
[Troop / +8 / 1VP] Inker
- - Teeth
SCUTTLER
[Troop / +7 / 1VP] Scuttler
- - Pincers
GUNSLINGER
[Troop / +13 / 1VP] Gunslinger
- - Twin Crystal Pistols
RIFLEMAN * 2
[Troop / +15 / 1VP] Rifleman
- - Crystal Rifle
CARATID * 3
[Specialist / +17 / 2VP] Caratid
- - Razor Claws
BATHOMITE
[Support / +35 / 4VP] Bathomite
- - Massive Claws
- - Crystal Cannon
THORGARIM HUSCARL
[Leader / +28 / 2VP] Thorgarim Huscarl
- - Hailstorm Pistol
- - Heavy Forge Hammer
STEEL WARRIOR
[Troop / +17 / 2VP] Steel Warrior
- - Mk2 Hailstorm Rifle
[Specialist / +19 / 3VP] Brakkarim
- - Hailstorm Autocannon
BROKKR
[Troop / +16 / 1VP] Brokkr
- - Burst Pistol
- - Forge Hammer
- - [+2] Ammo [one-use]
BOMB BOT
[Troop / +6 / 0VP] Bomb Bot
- - Bomb Bot
FORGE GUARD
[Specialist / +30 / 3VP] Forge Guard Issilgarim
- - Forge Hammer
- - Magma Cannon
THORGARIM *2
[Troop / +17 / 2VP] Thorgarim
- - Heavy Forge Hammer
HAMMERFIST DROP TROOPER
[Specialist / +30 / 2VP] Hammerfist Drop Trooper
- - Forge Hammer
- - Inferno Drill
We played the Deepstrike mission that sees ranges restricted on turn 1 and deeper than normal deployment zones in opposite corners. For the Nameless the Caratid's have been working really well for me and they have so far been more than able to hold their own in melee against the best the Forge Fathers have to offer. The Psychotroid has been less impressive and the ability you seem to take it for (Hyperkinesis, removes activation marker from target) is unreliable as you need two 5+'s on 3D8. I think that taking the more reliable melee abilities of The Blight is the way I will go for the event.
The second game of the weekend was Armada which is a bit more of a squeeze on the table I have available but still perfectly playable.
We played the Smugglers run scenario which sees the two sides distribute loot tokens across their fleets and then they need to time their run to a endzone to end up with the loot carry ships in the zone after 6 turns.
KTHORLAQ'S SHIELD (Main Battle Ship) [103]
Regular Crew
Red Hot Shot, Firebrand, Brew of Strength
TYRANT (Main Battle Ship) [64]
Regular Crew
Boarding Nets, Ogre Mercenaries
J'KOOR'UK (Main Battle Ship) [28]
Regular Crew
J'KOOR'UK (Main Battle Ship) [28]
Regular Crew
HERALD (Support Ship) [20]
Regular Crew
WARDEN SQUADRON (Support Ship Sq) [7]
Regular Crew
RIPPER HULK (Main Battle Ship) [129]
Veteran Crew
Grappling Hooks, Morax, Morguns, Yinn Greythunder, War Drum of Spite
SMASHER (Main Battle Ship) [65]
Regular Crew
Grappling Hooks, Morax
BLOOD RUNNER (Support Ship) [16]
Regular Crew
BLOOD RUNNER (Support Ship) [16]
Regular Crew
BOMBBOAT (Support Ship) [19]
Regular Crew
Boarding Nets
RABBLE SQUADRON (Support Ship Sq) [5]
Inexperienced Crew
This means that you don't want your loot carries to arrive into the endzone too early which gives you a chance to try and disrupt the enemy ships trying to do the same. It also means you can't really avoid the enemy as you are all heading towards the same zone.
The game saw the two XL ships trading some early blows with the Orcs short range being balanced by the Salamanders poor gunnery skills.
The Orc XL did manage to dispatch the Salamander Tyrant but it proved to be carrying to bluff tokens rather than actual loot.
On the last turn of the game the one of the Orc's tokens was stuck outside the endzone but with a last gasp it managed to deliver a fatal broadside to a Salamander ship carrying 1 token to eek out a draw.


No comments:
Post a Comment