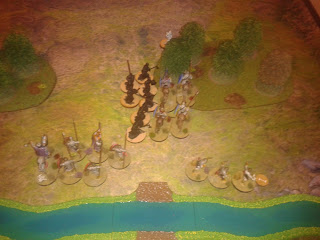
This was the first game in which we used the terrain placement rules from Cross & Crescent and as I hoped to cut down the long range firing from the Normans I opted to put down a wood in Micks half and a LOS blocking hill near the ford I was going to try and cross. Once the terrain has been laid out ( players choose upto 3 pieces and then take it in turns to set down ) you get to choose one piece of terrain and if you roll high enough can move or even remove it. In this instance the terrain stayed put.
The Normans setup on a wide frontage and the Byzantines concentrated on the right side of the table aiming to use the terrain to reduce the Norman shooting.
The first couple of turns saw the Byzantines push towards the right ford and the Normans efforts to move forward somewhat hampered by the woods. On the Byzantine left the Norman archers had a good field of view so the Byzantines hung back out of range.
The Normans then launched a surprise ( well to the Byzantines anyway ) charge across the right ford using an ability that lets them move through friendly units ( not normally allowed ) and giving them extra movement range. This almost wiped out a unit of Spear warriors and left the Byzantine Warlord in a dangerous position.
Fortunately the spearmen and nearby bow unit weakened the cavalry enough for the Warlord and second unit of spears to wipe them out.
The Byzantines then pushed into the ford in the face of heavy Norman crossbow fire.
Over on the left flank the Byzantine cavalry had moved over to support the attack on the right ford and the Normans had moved forward a little but still not enough to get into shooting range.
This brought the game to the final turn and the Byzantines pushed as many troops across the ford as they could and even managed to get a cavalry charge into the crossbow men who had been happily shooting the infantry down. This lead to only one crossbowman surviving.
On the left the lone Byzantine archer unit had pushed up to the ford to try and stop any Normans crossing.
The Normans had the final move and facing a heavy defeat tried to reduce the Byzantines scoring by charging the cavalry near the right ford and also making a dash across the left ford with there Warlord and remaining cavalry unit.
On the right the Norman infantry did a few casualties but not enough to seriously reduce the Byzantine force across the river.
On the left the Byzantine archers put up a brave fight and managed to kill half the attacking Norman cavalry. This left the Normans with 6 Victory Points to the Byzantines 11 points, so the Byzantines returned back to winning ways, hooray !
This was an interesting scenario and I had initially thought it would turn into a slugging match in the ford but whilst the ford did serve to channel the fight we still had some maneuvering to do as well.


No comments:
Post a Comment